1. Coconut substrate: The natural boost for your cannabis plants
Coco substrate is the insider tip among cannabis growers and for good reason. This natural medium offers your plants optimal conditions for explosive growth and abundant yields. But what makes coco so special?
The advantages of coconut substrate at a glance
Coco combines the best qualities of soil and hydroponics. It is airy, retains water excellently and offers your roots plenty of room to grow. Here are some of the main advantages:
- Excellent water storage combined with good drainage
- High air capacity for healthy roots
- pH-neutral and easy to handle
- Sustainable and environmentally friendly
- Reusable for multiple harvest cycles
These properties make coconut a real growth boost for your cannabis plants. Compared to conventional soil, you can expect up to 30% higher yields!
Proper preparation is everything
Before you start, you need to prepare your coco substrate properly. High-quality coco products are already washed and buffered, but an additional treatment won't hurt. Water the substrate thoroughly and let it soak for 24 hours. After that, you can soak it with a light nutrient solution to prepare it for your plants.
Nutrient management in coconut
Unlike soil, coco does not naturally contain any nutrients. This gives you full control over your plants' nutrition, but also requires more attention. Use special coco fertilizers that are tailored to the specific needs of this medium. Pay particular attention to an adequate supply of calcium and magnesium, as coco can bind these nutrients.
| nutrient | Importance of cannabis in coconut |
|---|---|
| Calcium (Ca) | Prevents nutrient blockages, strengthens cell walls |
| Magnesium (Mg) | Essential for chlorophyll formation and photosynthesis |
| Iron (Fe) | Important for chlorophyll production and metabolism |
With the right preparation and care, coco substrate becomes the key to healthy, strong cannabis plants and bountiful harvests. Experiment with different coco blends and find out what works best for your specific growing situation. Your plants will thank you with explosive growth!
2. Setting up the perfect grow box: Maximum yield in the smallest space
A well-configured grow box is the heart of your cannabis cultivation in coco. It creates the ideal environment for your plants, maximizing yield while minimizing space requirements. Let's go through the most important aspects step by step to optimize your grow box.
Choosing the right size
The size of your grow box depends on your goals and possibilities. For hobby growers, a box measuring 80x80x160 cm is recommended. This offers enough space for 2-4 plants and can be discreetly placed in most rooms. Remember: the larger the box, the more control you need over environmental factors such as temperature and humidity.
Ventilation: The key to healthy plants
Good ventilation is particularly important in coco setups. It prevents waterlogging and mold growth. Install at least one exhaust fan at the top of the box and a small oscillation fan for air circulation. An activated carbon filter also helps to neutralize odors.
Light setup for maximum growth
LED grow lights are the first choice for coco growers. They produce less heat than HPS lamps and use less power. For an 80x80 cm box, an LED with 240-300 watts of real power consumption is recommended. Make sure you get a full-spectrum light that supports both the growth and flowering phases.
Container and coconut setup
Pots with good drainage are particularly suitable for coco. Air-Pots or Smartpots also promote air circulation at the roots. A pot size of 11-15 liters is ideal for most setups. Fill the pots with prepared coco and place them on saucers or a flood tray for easy water management.
| component | Recommendation for 80x80 cm box |
|---|---|
| Light | 240-300W LED Grow Light |
| ventilation | 1x 125mm exhaust fan, 1x 15cm oscillation fan |
| Pots | 2-4 pieces, 11-15 liters each |
Monitoring and automation
Invest in a good thermo-hygrometer to keep an eye on temperature and humidity. For advanced growers, an automatic watering system is worthwhile. It saves time and ensures a constant supply of water to your plants - especially important for coco substrates, which require more frequent watering than soil.
With a well-set up grow box, you can create the perfect environment for your cannabis plants in coco. You'll be amazed at how much yield you can get in a small space. Take your time to set it up and fine-tune it - your plants will thank you with explosive growth and abundant harvests!
3. Nutrients and watering: How to pamper your plants properly
When cultivating cannabis in coconut, the right nutrition and watering are crucial for success. Unlike with soil, you have to provide all the nutrients right from the start. But don't worry, with the right tips, your coconut grow will be child's play!
The basics of coconut nutrition
Coconut is naturally low in nutrients, which gives you full control over your plants' nutrition. Use special coconut fertilizers that are tailored to the specific properties of the substrate. These usually contain more calcium and magnesium, as coconut can bind these nutrients.
A typical nutrient plan for cannabis in coconut looks like this:
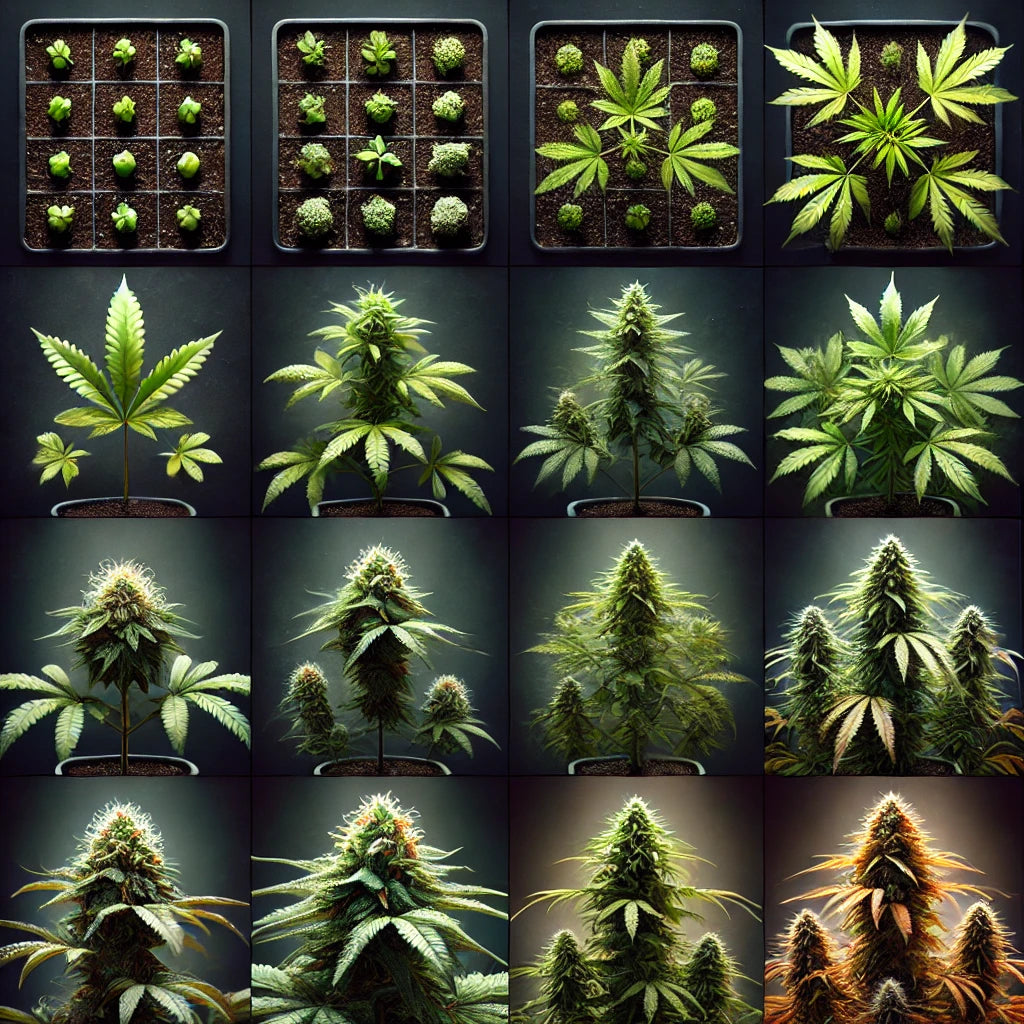
- Vegetative phase: NPK ratio of about 3-1-2
- Flowering phase: NPK ratio of about 1-3-2
- Additional calcium-magnesium supplementation throughout the growth cycle
Irrigation techniques for optimal growth
Coconut has excellent water retention capacity, but it also tends to dry out. Here are some watering tips:
- Water more frequently, but in smaller amounts than you would with soil.
- Aim for 10-20% runoff each time you water to avoid salt buildup.
- Monitor the pH of the irrigation water - keep it between 5.5 and 6.5.
- The frequency of watering depends on factors such as plant size, temperature and humidity.
EC value and pH management
The EC value (Electrical Conductivity) provides information about the nutrient concentration in your solution. The following guidelines apply to cannabis in coconut:
| Growth phase | EC value (mS/cm) |
|---|---|
| Seedlings | 0.8 - 1.0 |
| Vegetative phase | 1.2 - 1.6 |
| Early flowering | 1.6 - 2.0 |
| Late flowering | 1.8 - 2.2 |
The pH affects the nutrient uptake of your plants. In coco, you should aim for a pH between 5.5 and 6.5. Check the pH of your nutrient solution and drain regularly to avoid nutrient blockages.
Special coconut techniques
A popular technique among coconut growers is "fertigation" - the combination of watering and fertilizing. You add a weak nutrient solution with each watering. This promotes even growth and prevents nutrient fluctuations.
Also experiment with "high-frequency fertigation". This involves watering several times a day with a weak nutrient solution. This method can lead to explosive growth, but requires careful monitoring.
Final tips
Watch your plants closely. They will show you if they need more or less nutrients. Start with a low dosage and increase it slowly. It is easier to correct undersupply than oversupply.
With the right nutrition and watering, you will achieve phenomenal results in your coco grow. Your plants will thank you with strong growth and rich harvests!
4. Light and climate control: optimal conditions for lush growth
Proper lighting and climate control are crucial to the success of your cannabis cultivation in coco. These factors directly affect the growth, health and ultimately the yield of your plants. Let's dive deeper and find out how to create the perfect environment for your green treasures.
Lighting: The power of photons
Modern LED grow lights are recommended for cannabis in coconut. They offer several advantages:
- Less heat generation than HPS lamps
- Energy efficiency and therefore lower electricity costs
- Customizable spectra for different growth phases
- Longer lifespan
Aim for a light intensity of 30-50 watts of real power consumption per square foot (approx. 30x30cm) of your growing space. During the flowering phase, you can even increase the intensity up to 65 watts per square foot.
Light cycles for optimal growth
Follow this lighting scheme for best results:
| Growth phase | Light rhythm |
|---|---|
| Germination & Seedlings | 18-24 hours light / 6-0 hours darkness |
| Vegetative phase | 18 hours light / 6 hours darkness |
| Flowering phase | 12 hours light / 12 hours darkness |
Temperature management: The Goldilocks zone
Cannabis in coconut thrives best in a certain temperature range:
- Vegetative phase: 20-28°C (ideally 24-26°C)
- Flowering phase: 18-26°C (ideal 22-24°C)
Make sure that the night temperature is not more than 10°C below the daytime temperature to avoid stressful situations for the plants.
Humidity: The often overlooked factor
The right humidity is crucial for healthy growth and prevents mold growth. Follow these guidelines:
- Germination & seedlings: 70-80% relative humidity (RH)
- Vegetative phase: 50-70% RH
- Early flowering: 40-50% RH
- Late flowering: 35-45% RH
A dehumidifier can be essential during the flowering phase, especially if you are growing in a humid climate.
CO2 enrichment: The turbo for your plants
Advanced growers can increase growth even further by adding CO2. With optimal lighting and nutrient supply, a CO2 concentration of 1200-1500 ppm can increase yield by up to 20%. However, note that CO2 enrichment only makes sense in a well-sealed grow box with controlled ventilation.
Air circulation: movement is life
Good air circulation is especially important in coco setups. It prevents waterlogging, strengthens the stems and reduces the risk of mold and pests. Install oscillating fans so that they allow a gentle breeze to blow over your plants without stressing them too much.
Monitoring and automation
Invest in a good thermo-hygrometer to continuously monitor temperature and humidity. For even more control, you can use an automated climate control system that regulates temperature, humidity and even CO2 levels.
With the right lighting and climate control, you can create the perfect conditions for explosive growth and maximum yields in your coco grow. Remember: consistency is the key to success. Regular monitoring and gentle adjustments will lead to healthy, strong plants and a bountiful harvest!
5. Troubleshooting: Common problems and their solutions for coconut growers
Even experienced growers occasionally encounter challenges. While growing in coco has many advantages, it also comes with some specific problems. Don't worry! With the right knowledge, you can quickly identify and resolve most difficulties. Here are the most common problems and their solutions:
Nutrient deficiency: The silent saboteur
Coconut can quickly become nutrient deficient, especially in calcium and magnesium. Look out for the following signs:
- Yellow leaves (nitrogen deficiency)
- Brown spots (calcium deficiency)
- Yellow leaf edges (magnesium deficiency)
Solution: Use special coconut fertilizers and supplement with calcium-magnesium additives if necessary. Check the pH value regularly, as this affects nutrient absorption.
pH fluctuations: The key to nutrient absorption
Coconut does not buffer the pH as well as soil. Fluctuations can quickly lead to problems.
Solution: Check the pH of your nutrient solution before each feeding and keep it between 5.5 and 6.5. Invest in a reliable pH meter and calibrate it regularly.
Overwatering: A common beginner’s mistake
Although coco offers good drainage, problems can arise if watered incorrectly.
Signs:
- Wilted, drooping leaves despite moist substrate
- Slow growth
- Yellowish discoloration
Solution: Allow the surface of the substrate to dry slightly between waterings. Make sure your pots have good drainage and use air pots for better root aeration.
Salt deposits: The creeping danger
Coconut tends to accumulate salt residues, which can lead to nutrient blockages.
Solution: Flush your coco substrate every 7-10 days with clean, pH-adjusted water. Aim for 10-20% runoff with each watering to avoid salt buildup.
Pests and diseases: Unwanted guests
Pests and diseases can also occur in coconut. Common problems are:
- Spider mites
- Thrips
- Powdery mildew
Solution: Keep your grow box clean and check your plants regularly. At the first signs of pests or diseases, use biological control methods such as neem oil or predatory mites. In severe cases, special plant protection products may be necessary.
Temperature and humidity problems
Extreme temperatures or incorrect humidity can severely affect growth.
| problem | Solution |
|---|---|
| Temperature too high | Improve ventilation, use cooling systems |
| Temperature too low | Use heating mats or space heaters |
| Too high humidity | Use dehumidifiers, improve air circulation |
| Humidity too low | Use humidifiers or water bowls |
Lighting problems: Too much of a good thing
Light burns can occur if the lamps are too close to the plants.
Solution: Keep an appropriate distance between lamps and plant tops. For LED lights, it should be at least 30-45 cm. Watch your plants closely and adjust the height if necessary.
Final tips
Prevention is better than cure. Keep a grow diary to track changes. React quickly to the first signs of problems. Over time, you will develop a feel for your plants' needs.
Remember: every grow is a learning opportunity. Even if something goes wrong, take it as an opportunity to improve your skills. With patience and attention, you will soon be a master at growing coco and enjoy healthy, productive plants!


